3D Printing for Bayko
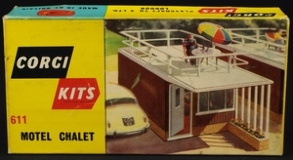
After finishing the Royal Clarence project I started to look around for other projects, since I had started collecting Bayko with the intention of using the buildings to show off my Corgi car collection, the old Corgi Kits caught my eye, in particular the Motel Chalet and Petrol Station. It also got me thinking how I could get as true as possible replica using Bayko. Large shop windows and tiles replicating wood planking were not standard Bayko parts, but then a light bulb went up! Why not make the missing parts myself?
Now the question was how to create these pieces? I had been dabbling with making my own tiles and windows with making moulds for casting brick tiles out of resin. I had even managed to make larger windows using broken standard windows carefully sawn apart and glued back together a la Frankenstein style. While it would be possible to make new tiles and windows this way, it required a lot of work and casting resin was a messy business.
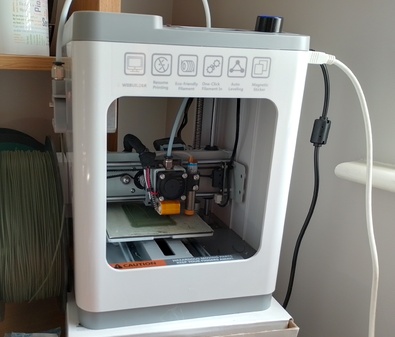
Some of the windows I used in the Royal Clarence Hotel were made by Rob Palmer using a 3D printer. So it occurred to me, why not use a 3D printer for these parts? So it was that after some advice from Rob, looking around the web for an inexpensive 3D printer I found one I could afford. The printing platform is only 100 x 120 mm and 100mm in height, but much of Bayko parts fit easily into that category. So I purchased my very first 3D printer.
Using an online 3D design software I made a few tests on how to make standard Bayko bricks, moving on to windows for practice.


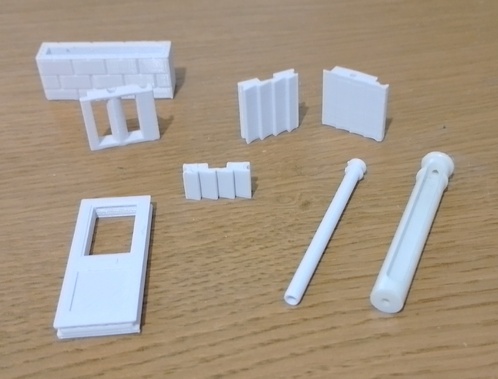
My first attempt at reproducing an old Corgi Kit with Bayko was the Motel Chalet pictured here. The chalet required tiles that looked like wood cladding, the balcony I adapted from standard balustrades, but to ensure a balustrade that went around the roof, I printed my version of corner balustrade pieces. The overhang was supported by pillars which were printed smaller than the standard Bayko pillars, and finished off the chalet with a planter in front.

You can see the new parts in the photo. I placed a standard pillar next to mine to show the difference in size. Standard and end bricks (handed). The cladding runs vertically. A 3D printer planter is in the background.You can also see my new balustrade corners, handed because of the shaped tops. A new door and half brick matching the new bricks. New thin pillars are used to support the overhang. A standard Bayko pillar next to it shows difference in diameters.
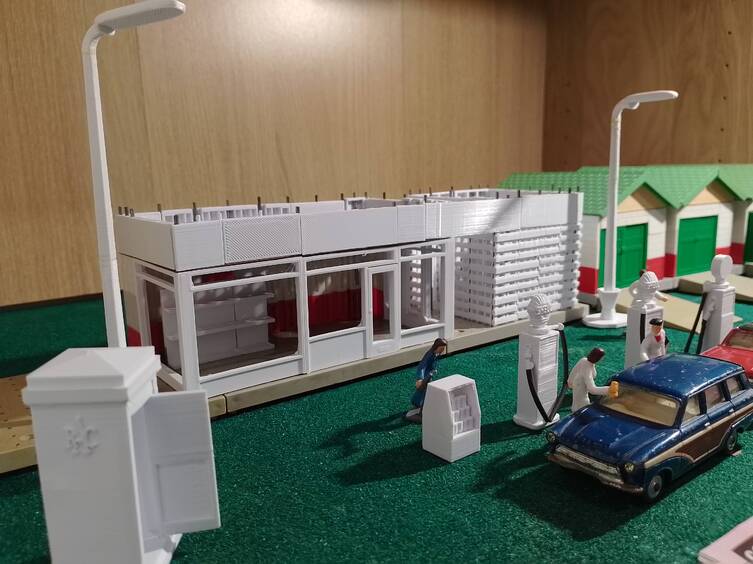
Some other projects with my 3D printer.
Windows, facia, wood slat tiles, shop shelving, petrol pumps, oil can display, RAC box and street lamps all printed.

In conclusion, 3D printing is easier to design, as you can make modifications easily on the computer. It is cleaner, and you get a real kick out of watching your project appear. The down side is it does take in some cases hours for a single item to be produced. Now I'm looking for new projects to try and create!
Prologue
The first printer I purchased lasted about three months before it stopped working. After sending it back I purchased a bigger one, which has served me well this past year or so.
Stay tuned for the next article: The Motel Chalet.
